Azure does not directly support failover clustering. This is due to the fact that Azure does not support shared storage. Since this is the case one of the options is to use some 3rd party software called SIOS Datakeeper cluster edition to create an Azure only failover cluster. In this guide we will go through creating the failover cluster in Server 2008 R2. Although this guide is made for 2008 the principles can be applied to 2012. This guide is for creating a file server cluster in Azure Classic, however it can be used for RM with the only difference being the PowerShell commands to create the load balancer.
Before you start creating the cluster nodes you need to have a working domain in place. Once you have one, we can start creating the cluster nodes. I would recommend creating the 2 cluster nodes with 2 Network cards. One for the LAN traffic and one for the replication. Ideally these should be on separate subnets. In my build I have assumed they are on separate subnets. The following prerequisites are needed.
- Separate Cloud Service for the cluster nodes
- Storage Account for each of the 2 Cluster Nodes
- Virtual Network with 2 subnets (Live and replication)
Once all the above is in place you can create the 2 Cluster nodes. Since they each need 2 Network cards, you have to create them using PowerShell. You cannot create a VM with 2 networks card in the GUI. You also cannot add a NIC to a VM once its built.
I have previously detailed how to build a 2 NIC VM. You can find this guide at the link below. Once you have the 2 nodes created come back to this guide.
Create a Virtual Machine with 2 NICs in Azure Classic
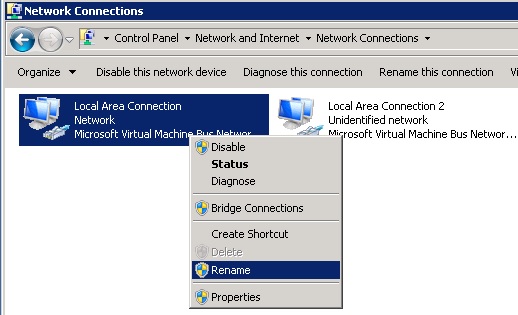
Once the VMs are booted and available, the first thing I do is rename the NICs in Network connections to Live and Replication on each node. This enables you to clearly see what the role of each NIC does. Right click on each network card and click rename.
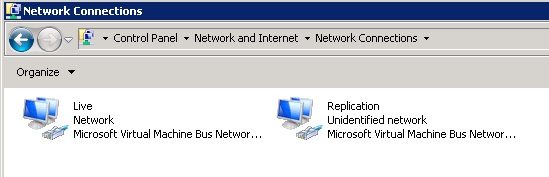
If you have a keen eye you will have noticed that also only 1 NIC has internet access. This will always be NIC 1. You are unable to have 2 NIC’s going out to the internet in Azure. All renamed below. Nice and tidy.
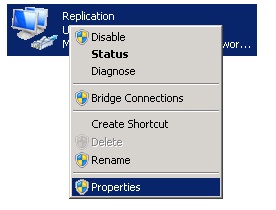
Now we need to turn off DNS registration on the Replication NIC. This ensures that when one tries to communicate with the server it only goes through the Live NIC. Right click on the Replication network connection, properties. Now double click on TCP/IP v4 and then into advanced. Under the DNS tab untick the DNS registration box.
Right click on the Replication NIC and click on properties.
Double Click on Internet Protocol Version 4 (TCP/IP v4)
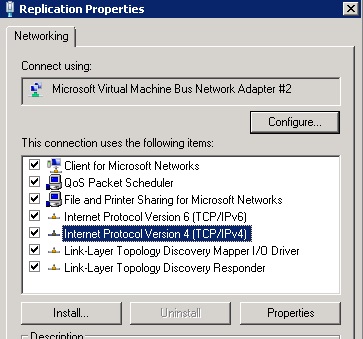
Click on the advanced button down the bottom right.
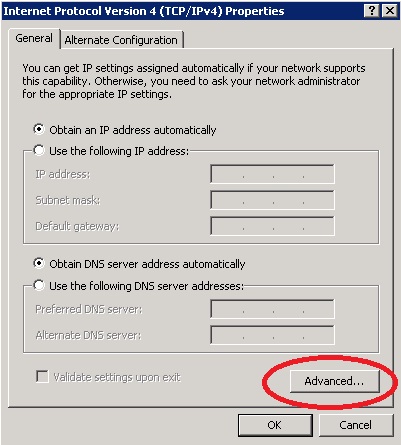
Click on the DNS tab along the top and then untick Register this connection’s addresses in DNS.
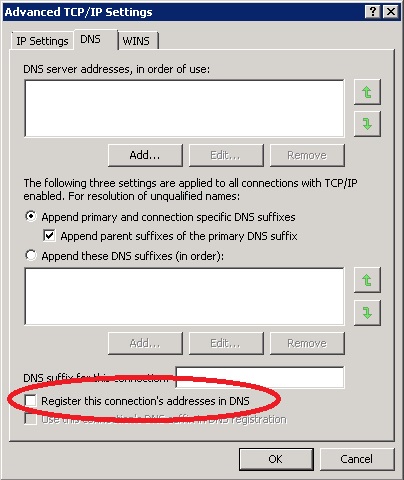
Once done save all the settings, click ok until your back at network connections.
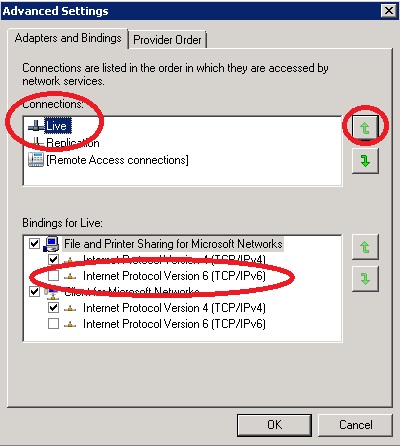
We also need to check to ensure the Live network card is used first. This is done under advanced settings in Network connections. Ensure that the Live NIC is at the top and first priority. When back in Network Connections press the Alt key to show the title menu. Then select advanced and then advanced settings.

Move the Live network connection to the top. Do this by highlighting Live and clicking the up arrow on the right. Also untick Internet Protocol Version 6 on each adapter and protocol. Once done click ok.
Now we need to install the roles that we require to build our cluster on each of the nodes. We also need to install .net 3.5 as this is needed by the SIOS cluster software. Open an elevated PowerShell window and run the command below to install the roles needed.
Import-Module ServerManager
Add-WindowsFeature as-net-framework
Add-WindowsFeature File-Services
Add-WindowsFeature -Name Failover-Clustering
You will need to reboot each of the nodes. Then install the 2 following Microsoft hotfixes.
Microsoft KB854082
Microsoft KB2494036
You should now add each of the nodes to your existing active directory domain. Once joined to the domain check to ensure DNS resolution is working as intended. Then go into the firewall settings on each node and disable the windows firewall. You can if you wish allow certain ports through to allow the cluster to work. However, this is out of scope of this guide and for simplicity we will disable it.
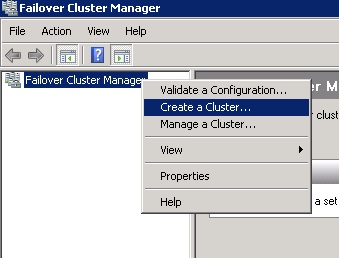
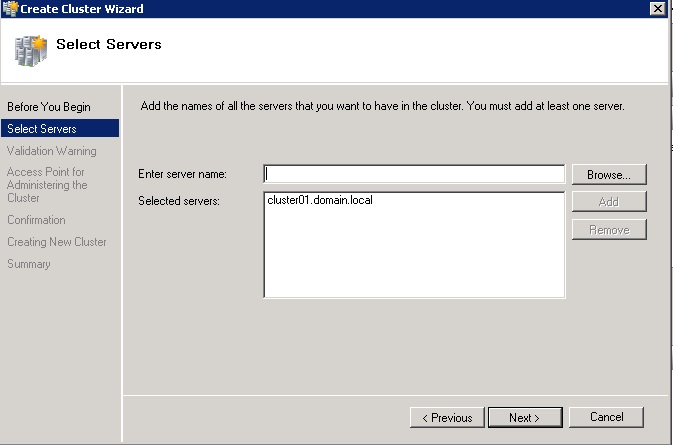
We will now focus on configuring the cluster. This can all be done from 1 of the cluster nodes. Open failover cluster manager and right click Failover Cluster Manager. Click create a cluster.
Azure assigns all addresses using Azure DHCP. Since we do not want this, we will have to change the cluster IP later. For now only add the one node. We will add the 2nd later on. Click next.
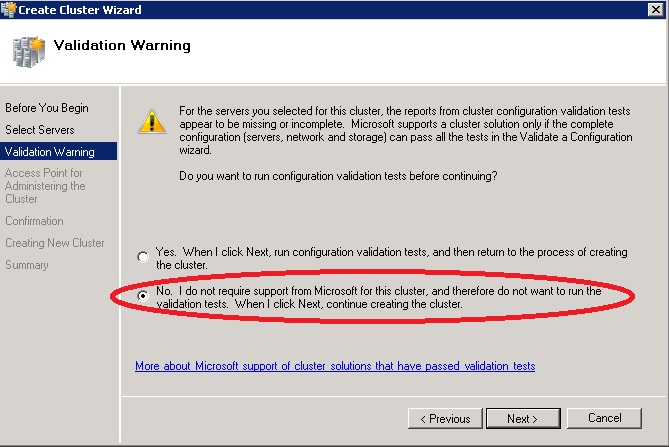
Dont worry about validating the cluster for now. Select no and then click next.
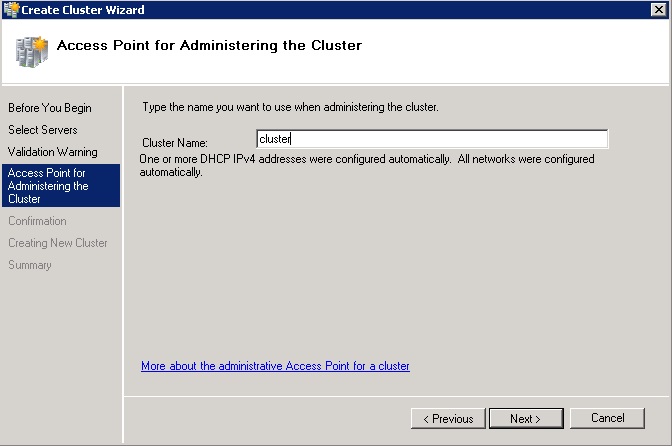
Give the cluster a name. We will not be referencing the cluster with this name so it doesn’t really matter. For my example I have called it “cluster”. Click next once you have entered a name.
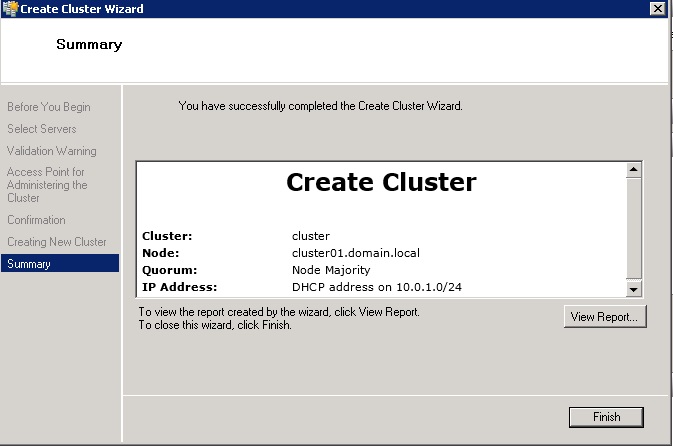
Confirm all the details are correct and click Next.
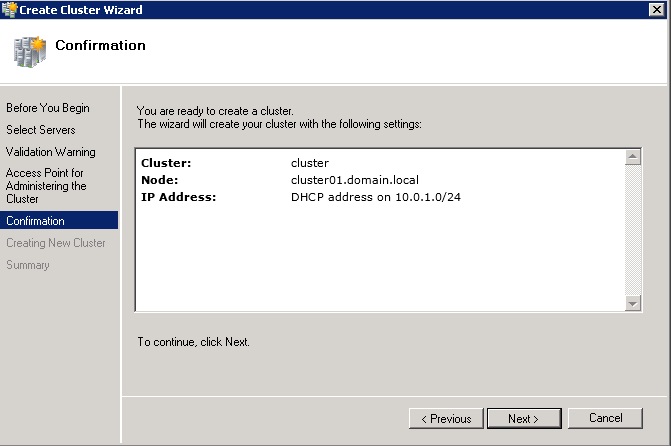
It will now create the cluster. Once finished click Finish.
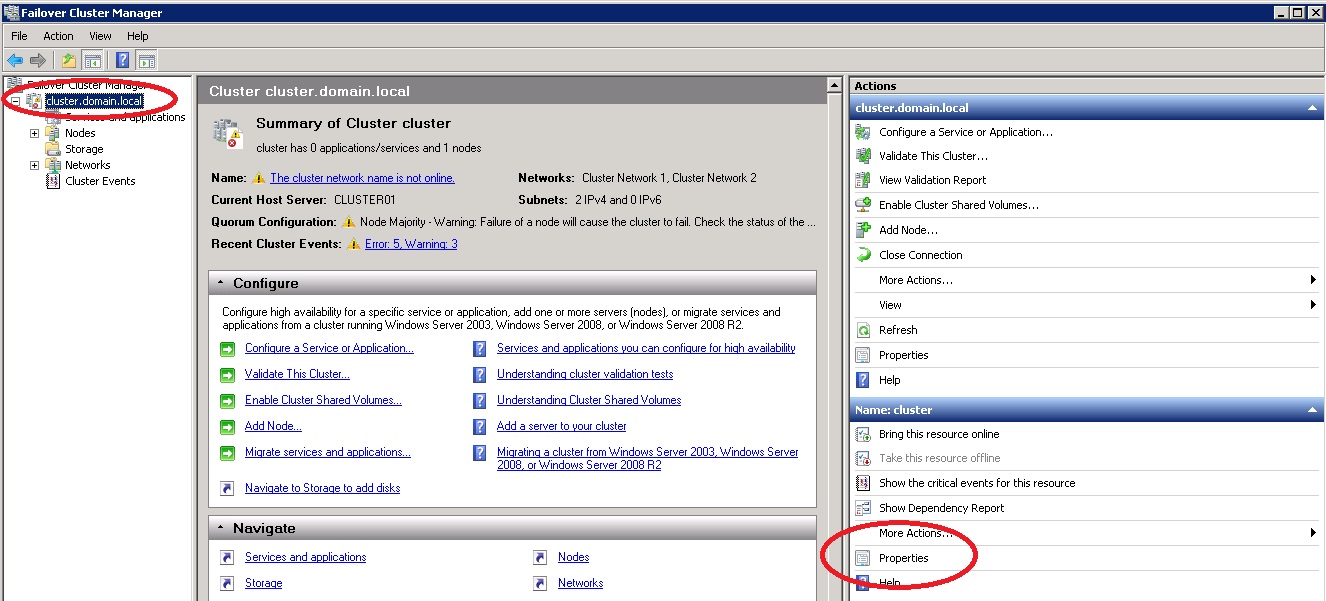
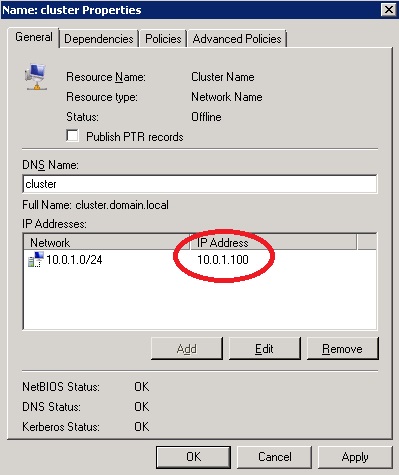
We now need to change the IP of the cluster. This is where the GUI is really misleading. Hightlight the cluster name and then click properties under the cluster name on the right. Its the one circled, not the one above.
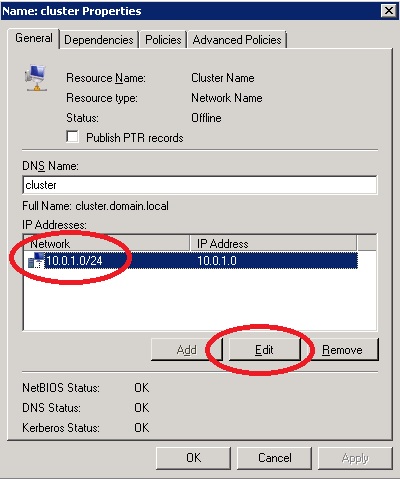
Click on the IP address and then click edit.
Type in the IP address that you want to use. It must not be in use obviously. In my example I have used .100 as I know its not in use. Once happy click ok.
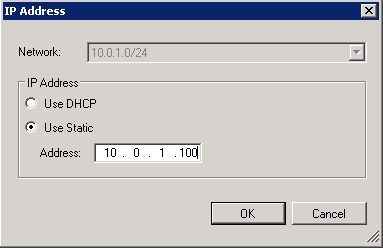
You will now notice the IP has changed to the one entered. Click ok.
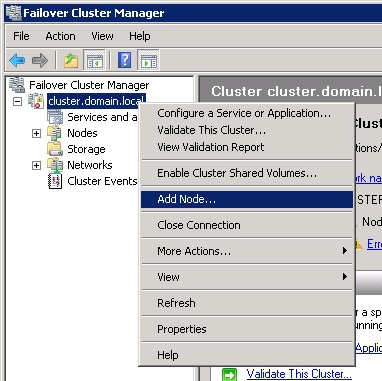
It will take a few seconds. Once done you will be back at the failover manager window. We can now add the 2nd node. Right click on the cluster and then click add node.
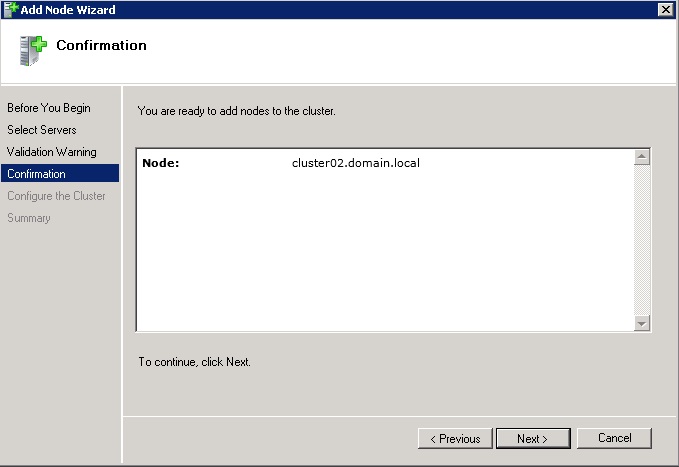
Browse and Add the 2nd node. Cluster02 in my example. Then click next. Then click next on the confirmation screen.
Once the cluster node has been added you might have a warning come up about Quorum and node settings. This is expected. We will configure this next.
Now we have the cluster in place we now need to create our cluster quorum. Create a file share on a server in Azure somewhere. Give everyone full read / write, also add the name of the cluster computer account and give it full permission. Also give it full NTFS permission. In the real world you can lock these permissions down further. In my example I am going to create a file share on my DC called DC01. The quorum should be located on a highly available machine, but this is a lab after all…
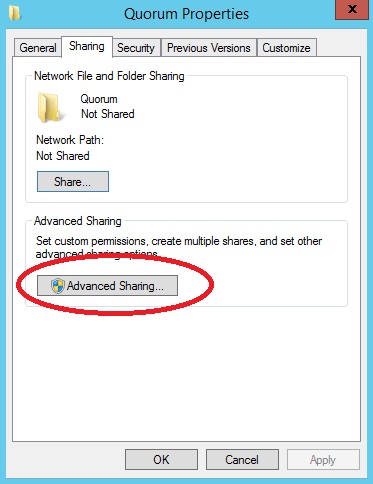
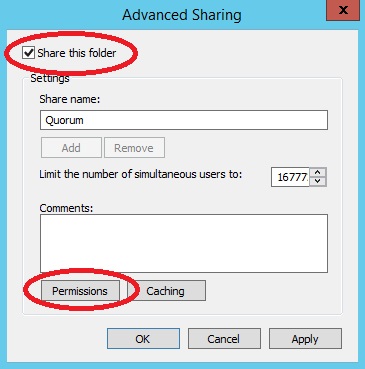
Create a folder on your server called Quorum. Right click on the folder and click properties. Go into the sharing tab and then click advanced sharing
Tick the share this folder box and then click the permissions button.
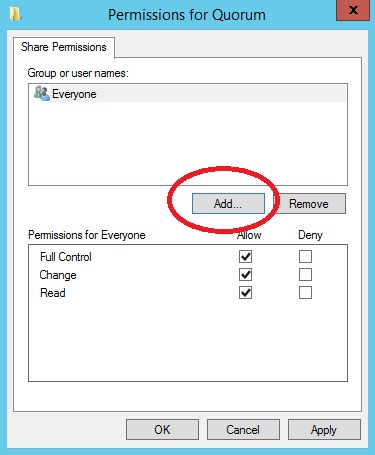
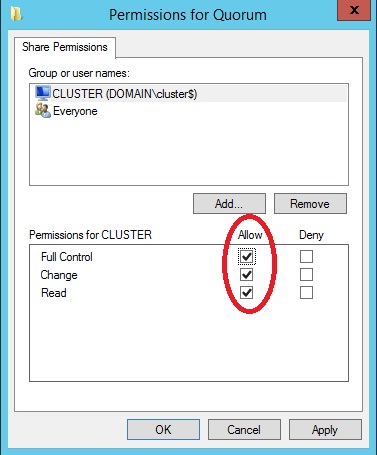
Change the permissions for everyone to full control and then click the add button. We now need to add the cluster name.
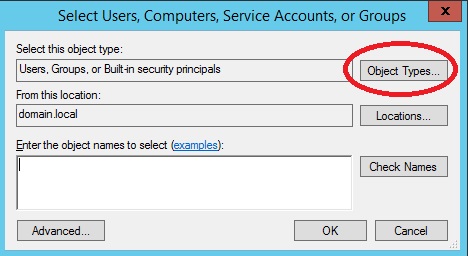
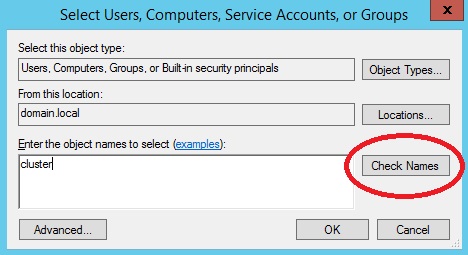
By default the permissions screen does not search for computer accounts. We need to change the search criteria. Click Object types in the top right.
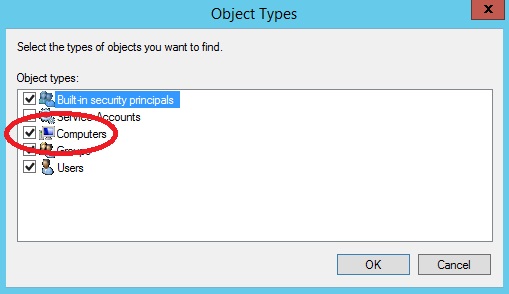
Tick computers and then click ok
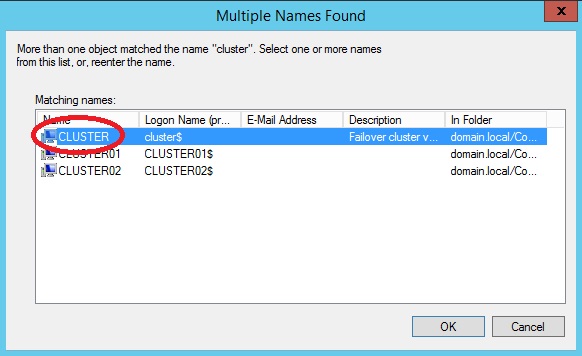
Type in the name of the new cluster we created and click check names. If you called your cluster name something obscure it will underline. If not it will ask to check which one is your cluster name.
In my example I doubled click on cluster.
Click ok back to the permissions screen. Change the permissions for the computer account to full control.
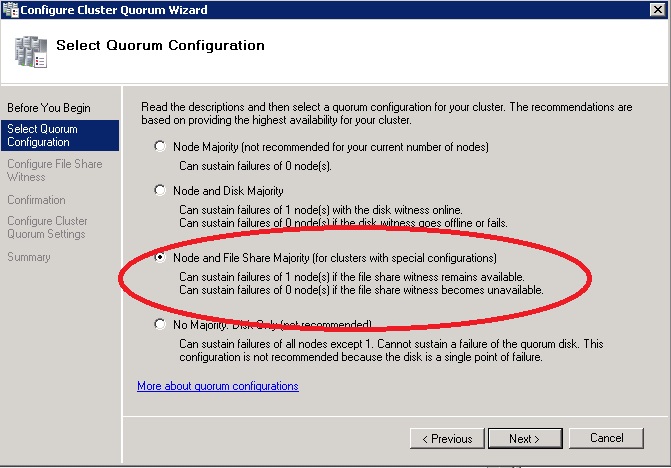
We have now created our quorum folder. Lets pop back over to failover cluster manager. Right click on the cluster and then click more actions, followed by Configure Cluster quorum settings.
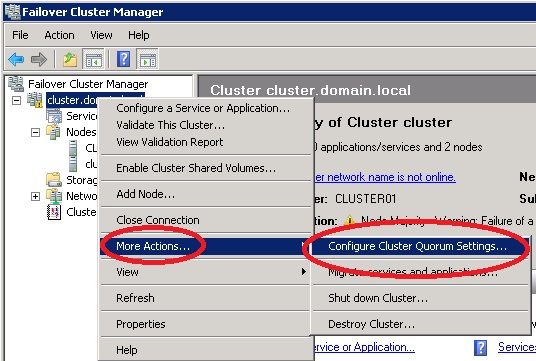
Select node and file share majority. Click next
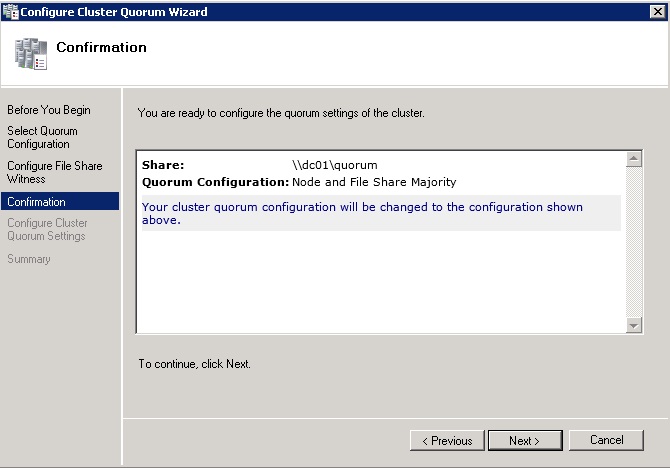
Enter the path of the newly created quorum share. Click next.
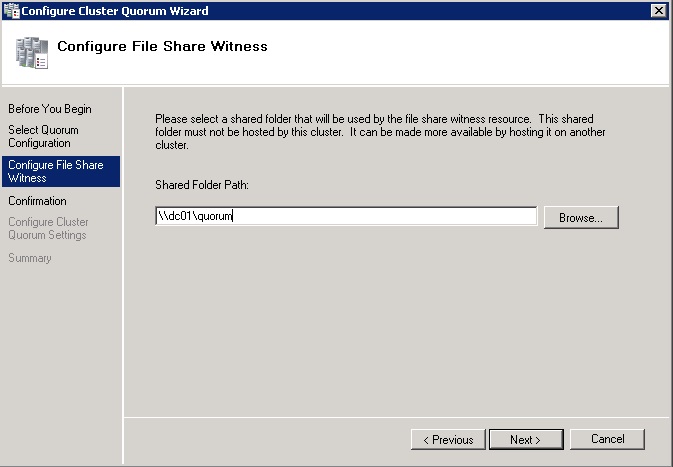
Click next. Once created click finish.
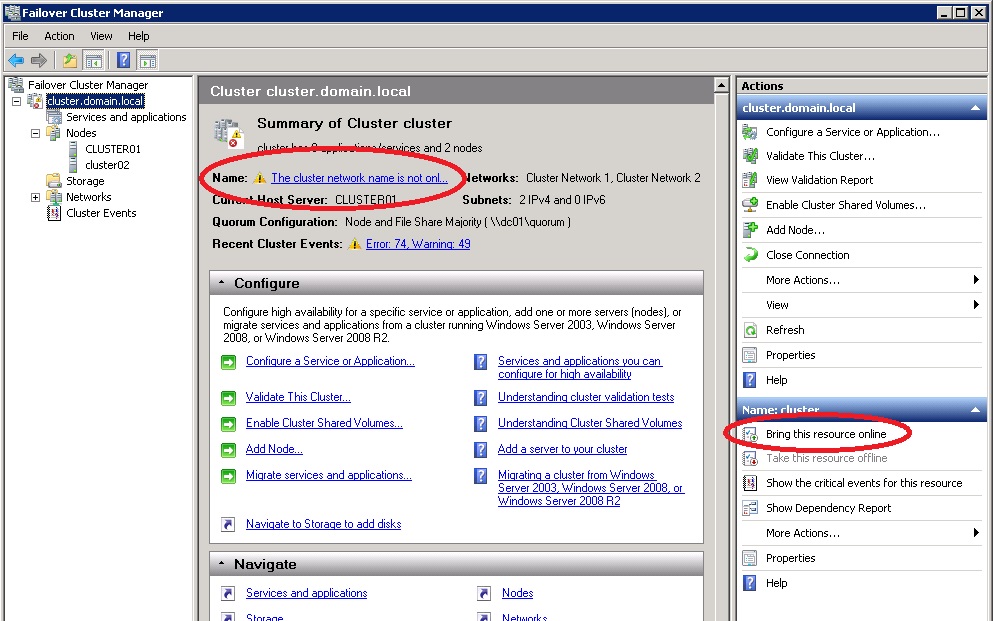
Our cluster is now complete. You can now bring the resource online down the bottom right corner of the Failover cluster manager window.
Before we can create our clustered file server role, we need to present some storage to failover cluster manager. We now need to install the SIOS software. I have detailed how to install it and present the storage in the guide at the link below :
Clustering Storage in Azure with SIOS Datakeeper Cluster Edition
We now have some storage available in failover cluster manager. We can now go ahead and create our File Server Cluster Resource.
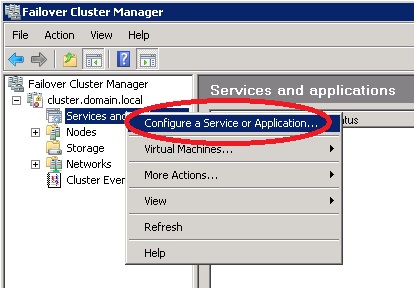
Right click on Services and application and then click on “Configure a service or application”
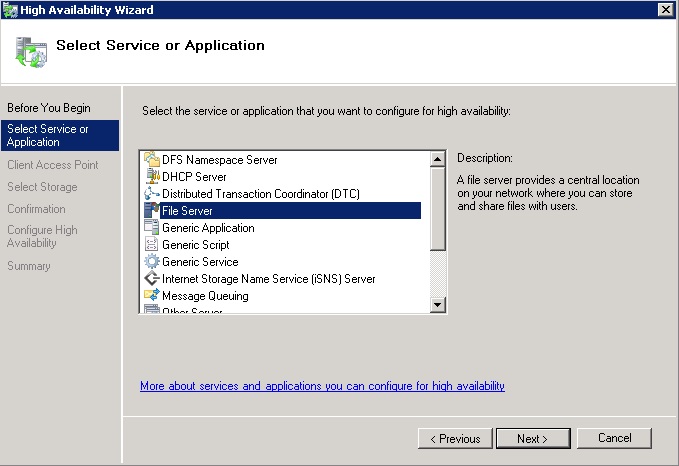
Select File Server. It will check to ensure you have the file server role installed so will take a few minutes. Once its happy click next.
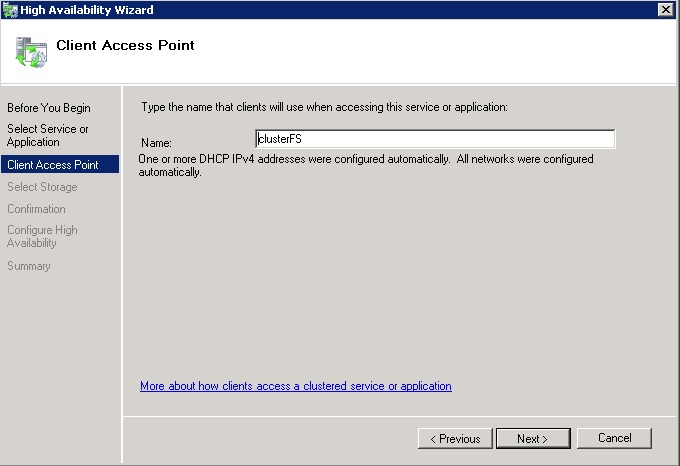
Choose the name of your file server cluster. I have called mine ClusterFS. You might want to give it a better name. Click next.
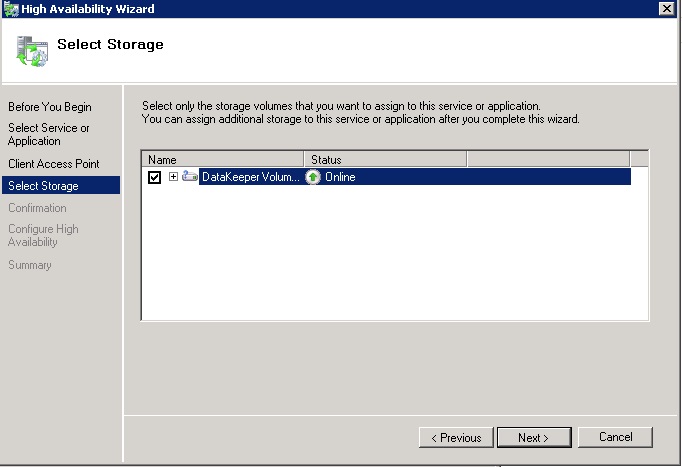
Choose the storage we added earlier and click next.
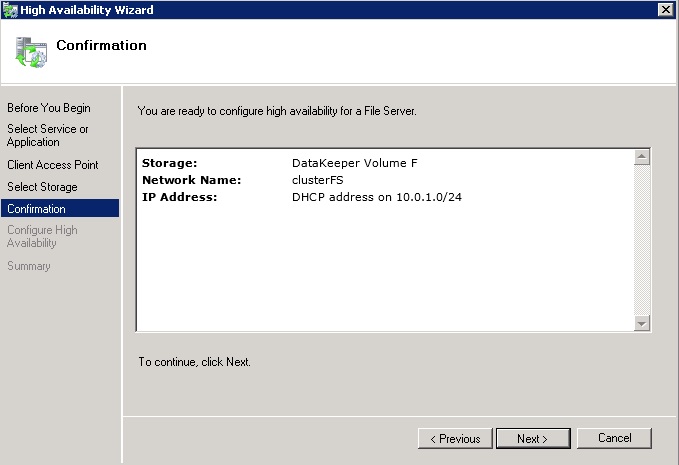
Confirm everything is ok and click Next.
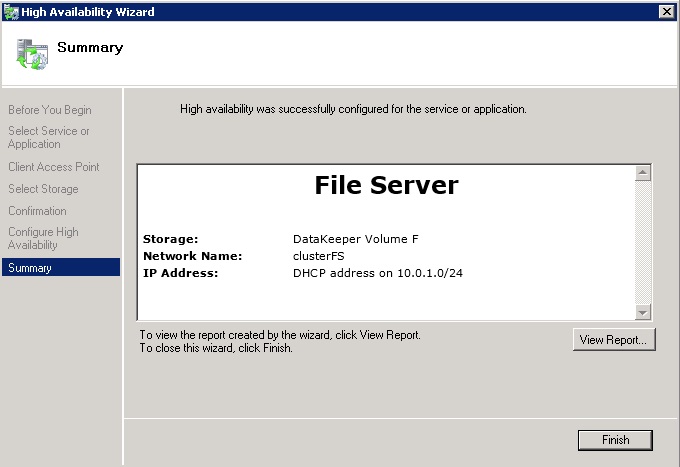
It will then configure it all. Click Finish.
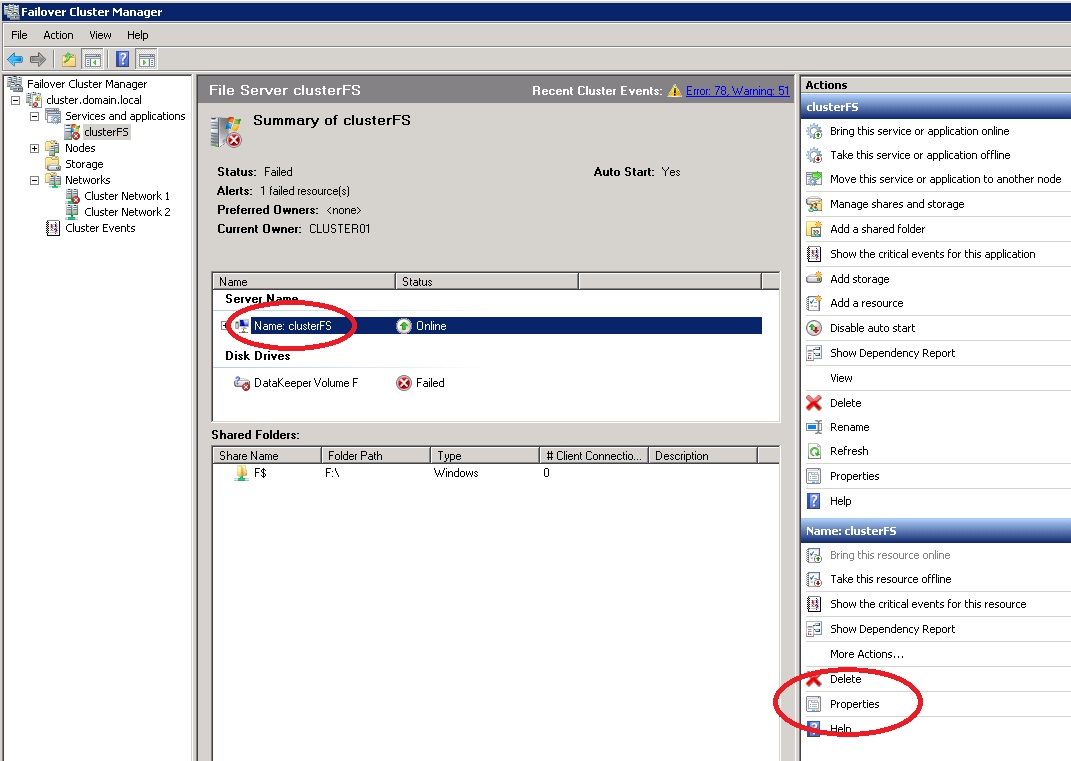
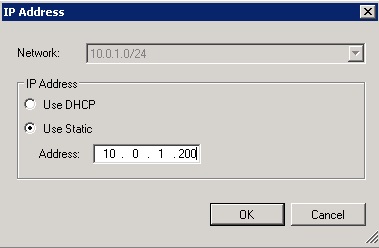
By default the cluster resource is brought online with an Azure DHCP address. We need to change this to a static address. Click on new cluster name as circled below and then on the right down the bottom click properties.
When the properties box comes up click on the IP addresses assigned and then click edit.
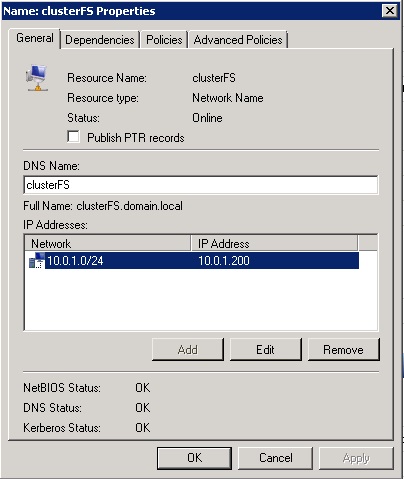
Enter our chosen IP followed by ok.
I would now reboot both cluster nodes so that they can come back up cleanly. You cluster resource should now come online. Noone will be able to access the resource as we need to use a load balancer in Azure to provide access for users.
We now need to run command in order to create the endpoints needed for the cluster. We need to find out some information first to build up the command. Open an elevated powershell window and run the following command on one of the cluster nodes.
Import-Module FailoverClusters
Get-ClusterNetwork
This will list our cluster networks. We will want to run the script on the one that is connected to Live / LAN. In my instance its still the default name so “Cluster Network 1”.

We now run another powershell command
get-clusterresourceWe want to select the one which has the IP resource of our new file server cluster. So in my example “IP Address 10.0.1.0”

We can now build the final command up we want to run. The $ILBIP is the IP of the cluster we just created.
$ClusterNetworkName = "Cluster Network 1"
$IPResourceName = "IP Address 10.0.1.0"
$ILBIP = "10.0.1.200"
cluster res $IPResourceName /priv enabledhcp=0 overrideaddressmatch=1 address=$ILBIP probeport=59999  subnetmask=255.255.255.255
We are now done on the cluster nodes, do one last reboot on them. We now need to create the Azure load balancer. Connect to Azure using PowerShell. If you need to know how to do this use the guide below :-
Connect To Azure with Powershell
Run the script below but change the variables to your config.
# Cloud Service where the load balancer needs to sit.
$ServiceName = "clusterservices"

# newly chosen name for the new ILB
$ILBName = "FileServerILB"

# subnet name that the VMs use in the VNet
$SubnetName = "Live"

# static IP address for the ILB in the subnet
$ILBStaticIP = "10.0.1.200"

# Add Azure ILB using the above variables.
Add-AzureInternalLoadBalancer -InternalLoadBalancerName $ILBName -SubnetName $SubnetName -ServiceName $ServiceName -StaticVNetIPAddress $ILBStaticIP
It should come back with succeeded

We now want to add the endpoints to each of the cluster VMs
# cluster nodes’ names, separated by commas. Your nodes’ names will be different.
$VMNodes = "cluster01", "cluster02"

# newly chosen name of the endpoint
$EndpointName = "SMB"

# public port to use for the endpoint for SMB file sharing. If the cluster is used for other purpose, i.e., HTTP, the port number needs change to 80.
$EndpointPort = "445"

# Add endpoint with port 445 and probe port 59999 to each node. It will take a few minutes to complete. Please pay attention to ProbeIntervalInSeconds parameter. This tells how often the probe port detects which node is active.

ForEach ($node in $VMNodes)
{
Get-AzureVM -ServiceName $ServiceName -Name $node | Add-AzureEndpoint -Name $EndpointName -LBSetName "$EndpointName-LB" -Protocol tcp -LocalPort $EndpointPort -PublicPort $EndpointPort -ProbePort 59999 -ProbeProtocol tcp -ProbeIntervalInSeconds 10 -InternalLoadBalancerName $ILBName -DirectServerReturn $true | Update-AzureVM
}
It will say its succeeded.

You can check it has run ok by running the following command
ForEach ($node in $VMNodes)
{
Get-AzureVM –ServiceName $ServiceName –Name $node | Get-AzureEndpoint | where-object {$_.name -eq "smb"}
}
We should now have a fully working file server cluster. Log back into the cluster node which is active. Then on the right, click on Add a shared folder.
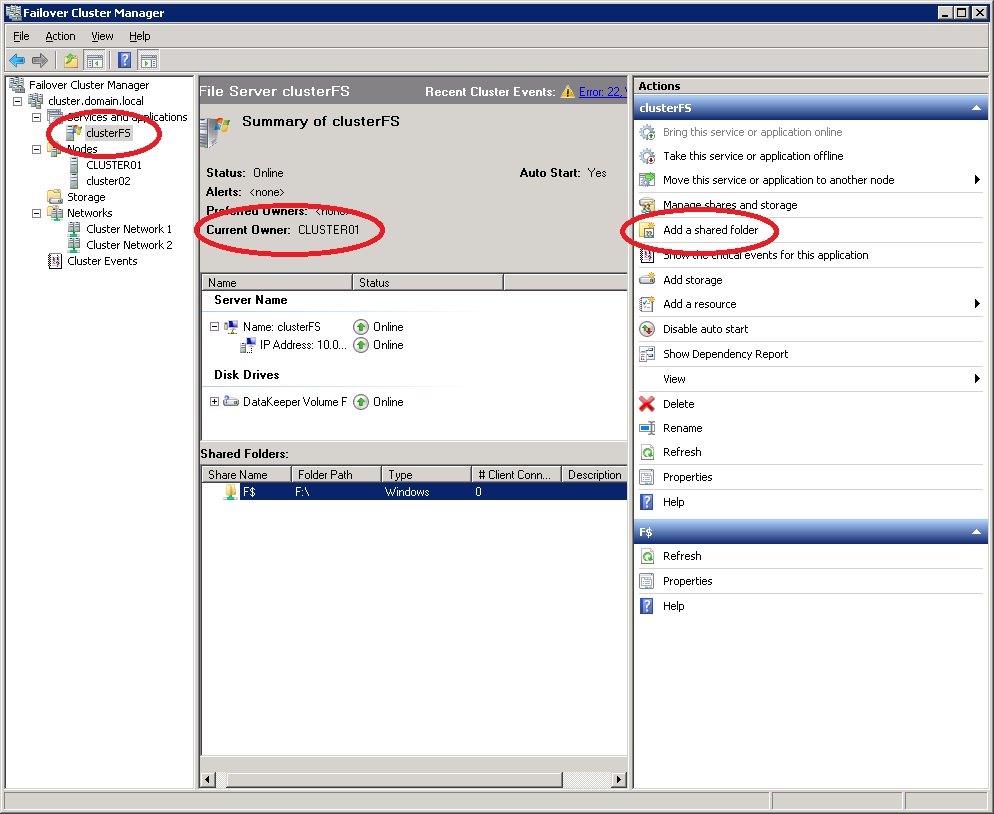
Add one from the F drive and it should now work on the UNC path \\clusterfs\ShareName
One thing to note is that you will NOT be able to ever ping the cluster IP. So dont worry if you get no reply!! Also if you move the cluster over to the other node, you will lose connectivity to the share for up to 10 seconds. This is due to the load balancer polling every 10 seconds. Enjoy 🙂