The other day I had to rename a VMDK in ESXi. I presumed it would be a simple matter of removing the VMDK from the Virtual machine, renaming it in the vSphere Client and then reattaching it. I presumed wrong. At the moment you cannot rename them using the vSphere Client. If you try you get the error :
At the moment, vSphere Client does not support the renaming of virtual disks as the machines that use this disk may loose access to the diskThe easiest way to rename them is to SSH to the ESXi server Service Console and do it via the command line. First of all though we need to identify the disk that we want to rename and note down a few settings.
Before you start I would recommend powering down the virtual machine before carrying out these steps.
In your vSphere Client right click on the Virtual Machine that has the disk we want to rename attached to it. Then click on edit settings. In my example I am going edit a disk on the VM called FileServer.

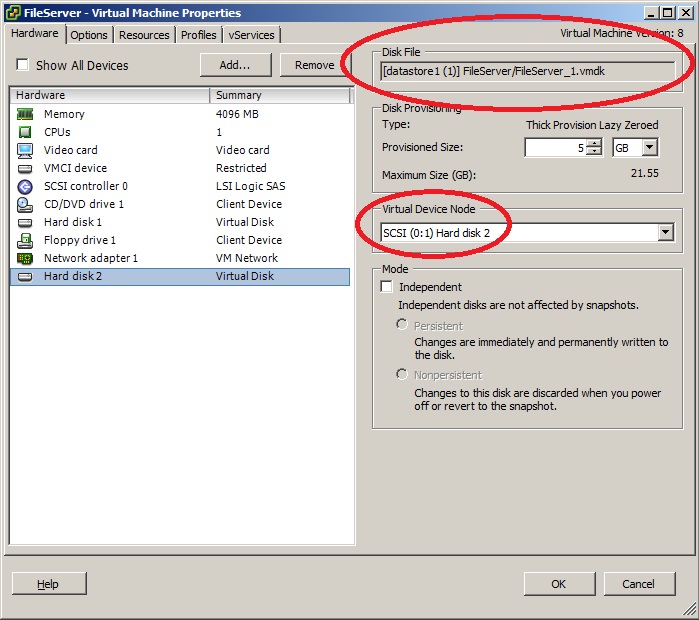
The Virtual Machine Properties window will now appear. On the screen click on the Hard Disk that you want to rename. In my example we are going to rename Hard Disk 2. Once you have clicked on it then write down the Disk File name at the top and the datastore that it sits on. Also note down the Virtual Device Node that the disk is attached to. We will need these details in order to rename it and also reattach it.
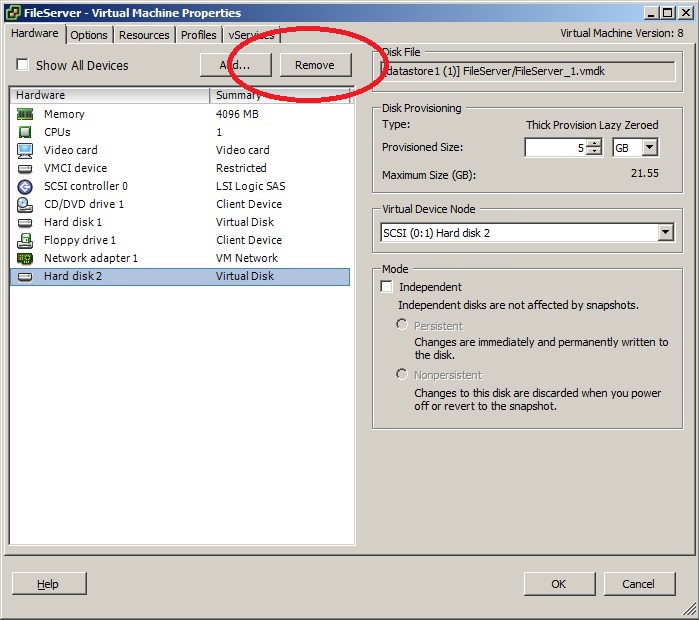
Once you have noted these down click on Remove at the top.
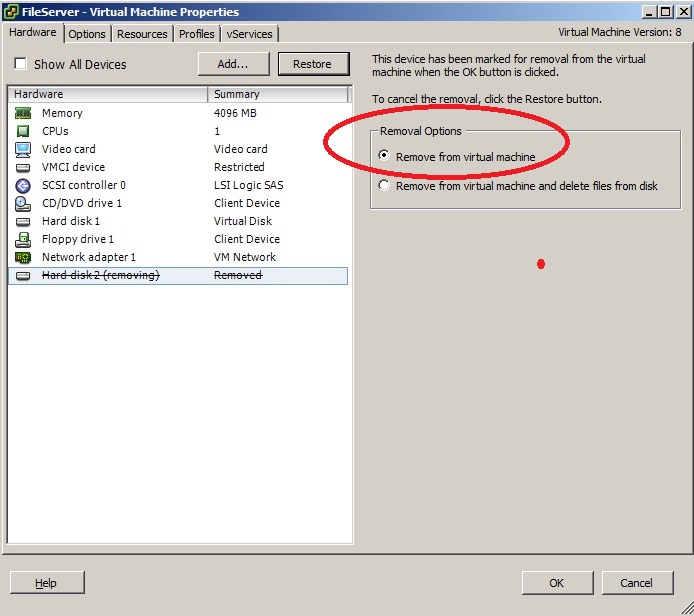
IMPORTANT : ON THE NEXT SCREEN SELECT THE TOP OPTION, REMOVE FROM VIRTUAL MACHINE
Your now go back to main vSphere Client screen.
We now need to SSH to a host that has access to the Datastore you noted down above. I suggest for ease you SSH to the host that has the VM registered on it. Before you can SSH to a host you will need to enable SSH for it. To do this follow my previous guide at the link below :
Once SSH is enabled you will need to use a SSH client like Putty.
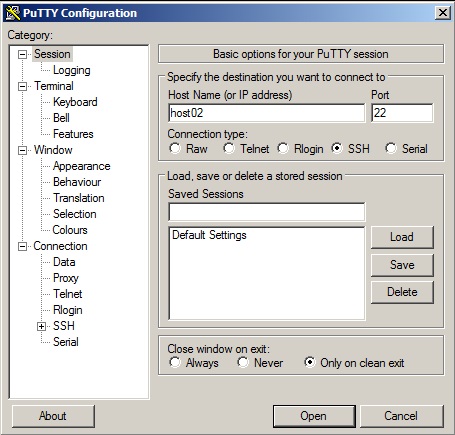
Open putty and put in the IP / Hostname of the ESXi Server that you enabled SSH on it. Then click open.
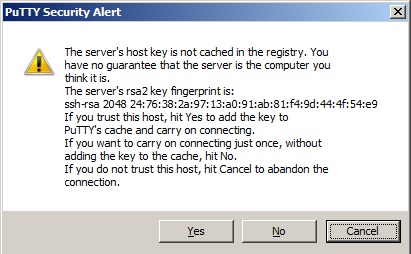
If you receive a Putty Security Alert Come up click Yes.
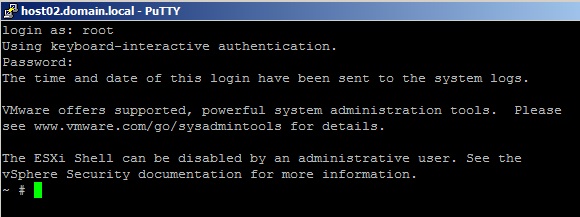
Enter the root username followed by the password you configured when you first setup the ESXi server. Your now be logged into the service console via SSH.
We now want to get into the directory where the VMDK is located that we want to rename. Using the information we collected before in my example we know the disk is located in :
datastore1 (1)/FileServerSo we can type
cd vmfs/volumes/If we then follow it with a
ls -lThis will list all the datastores.

Now we just need to change into the correct datastore. Unfortunately because VMware has labelled my datastore as datastore1 (1) we will need to put the next cd command in speech marks as it contains a space in the name.
cd "datastore1 (1)"VMware will change the datastore name to the UID of the datastore so dont be alarmed.

Now change into the Virtual Machine directory. If you do not know what it is do a
ls -lcommand first to list all of them.
ls -lcd FileServer
You can now carry out the command
ls -lahto list all the files contained in the folder.
ls -lah
We can see the disk that we want to rename FileServer_1.vmdk. We now use the VMKFSTOOLS command to rename it. This is done with the following syntax.
vmkfstools -E OldFileName.vmdk NewFileName.vmdkSo in my example I want to rename FileServer_1.vmdk to FileServer_Data.vmdk.
vmkfstools -E FileServer_1.vmdk FileServer_Data.vmdkIf we follow it with a
ls -lahwe can see the disk renamed.

Now we have renamed the disk we just need to reattach it to the Virtual Machine. Right click on the virtual machine we edited earlier and again click edit settings.

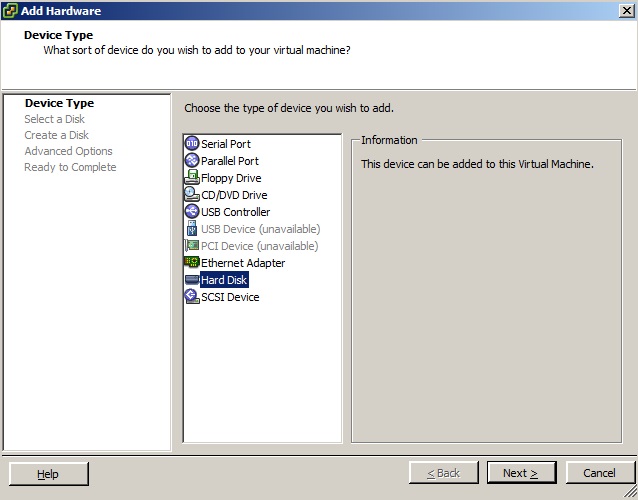
Click Add. Select Hard Disk as the Device Type. Then click next.
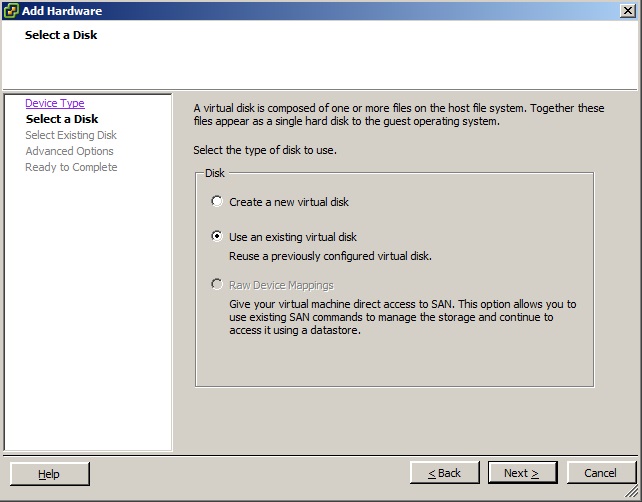
Select Use an existing virtual disk, then click next.
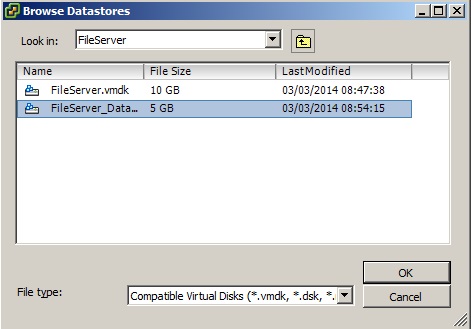
Browse the Datastores with the info you collected earlier until you find the renamed disk. Select it and click ok.
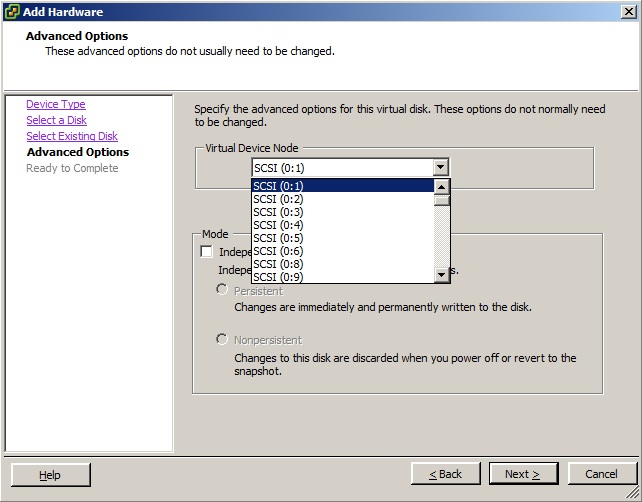
Under the advanced options select the same Virtual Device Node you noted down earlier. Then click next then finish.
Your all done.

