At work, I come across lots of Igel Universal Management Suites where the login is just set to 1 user. Its much better practice to setup the Igel UMS to use Active Directory Authentication. This way login’s are audited and the need for shared passwords is negated.
When setting it up I always create a security group called “Igel Admin” and assign this group permission to login to the UMS. In the example below I will set it up using this group. However it is possible to use Domain Admins if you so wished.
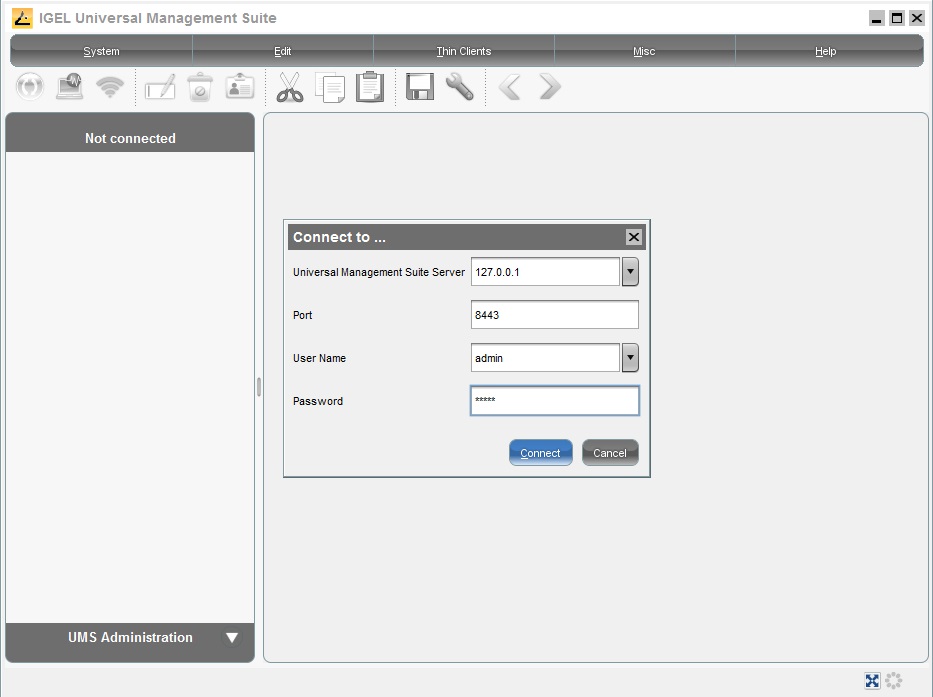
First of all login to the UMS as your local admin user.
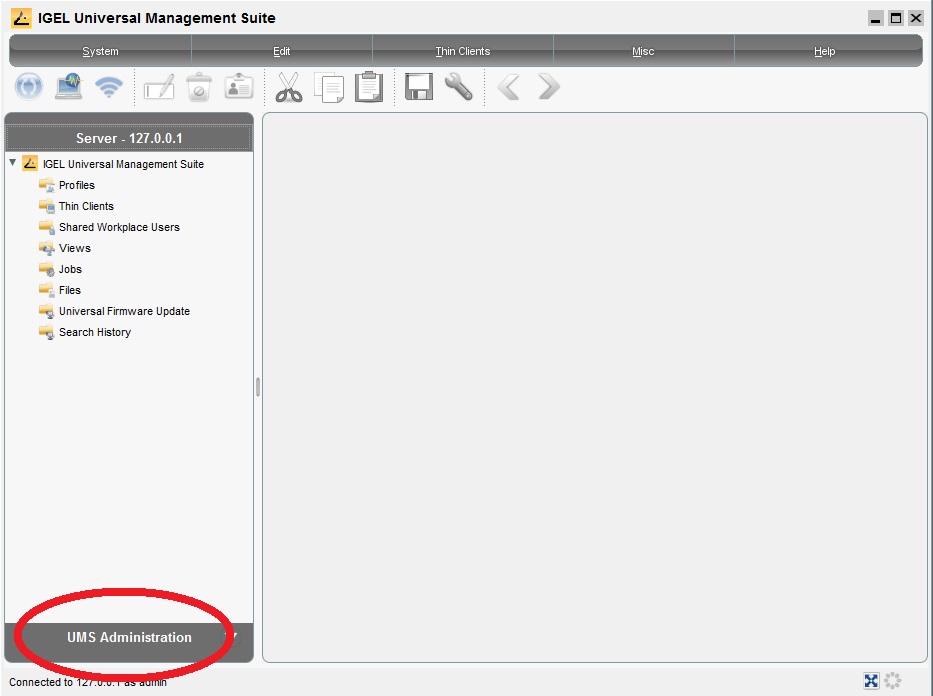
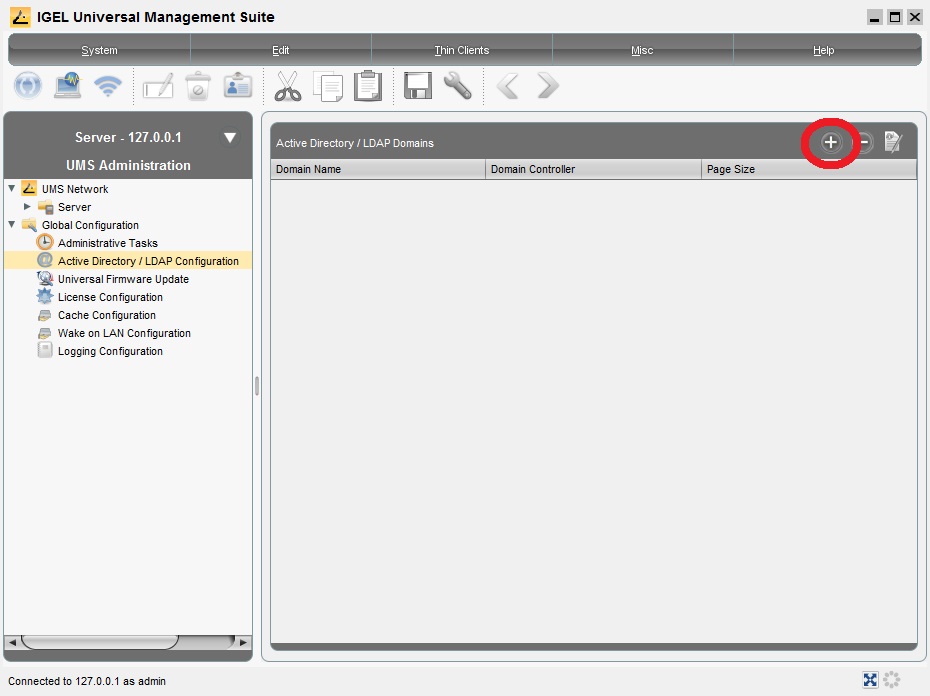
Once logged in click on UMS Administration down the bottom left.
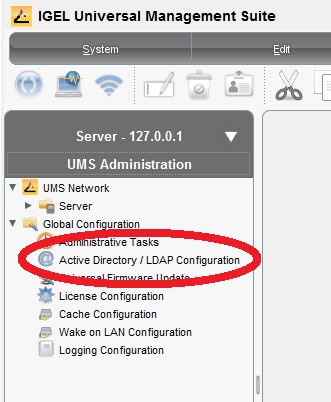
Then on the left hand side click on Active Directory / LDAP Configuration
On the right hand pane. Now click on the + sign at the top right.
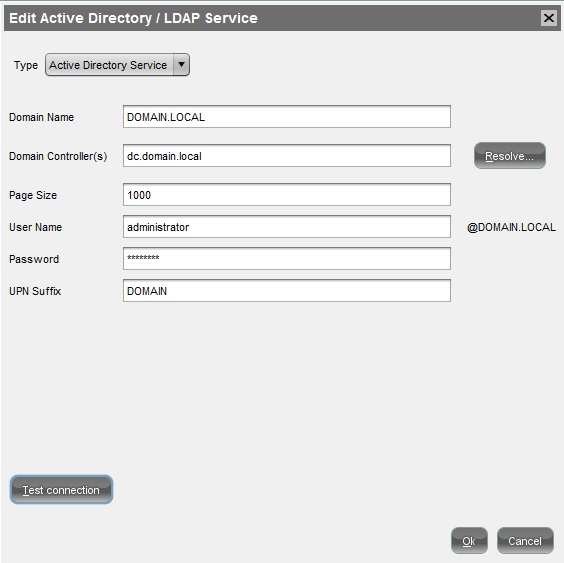
In the box that appears enter the following information
Type : Active Directory Service
Domain Name : Your internal Domain Name
Domain Controller(s) : Put in the name of your DC in here. If you dont know click Resolve and it will add a DC automatically.
User Name : Enter the Username of an account that can Query AD
Password : Password for the account above
UPN : Enter your Domain UPN
In my example below I have just used the domain administrator account for the username.
Click Test when done. It should test ok.
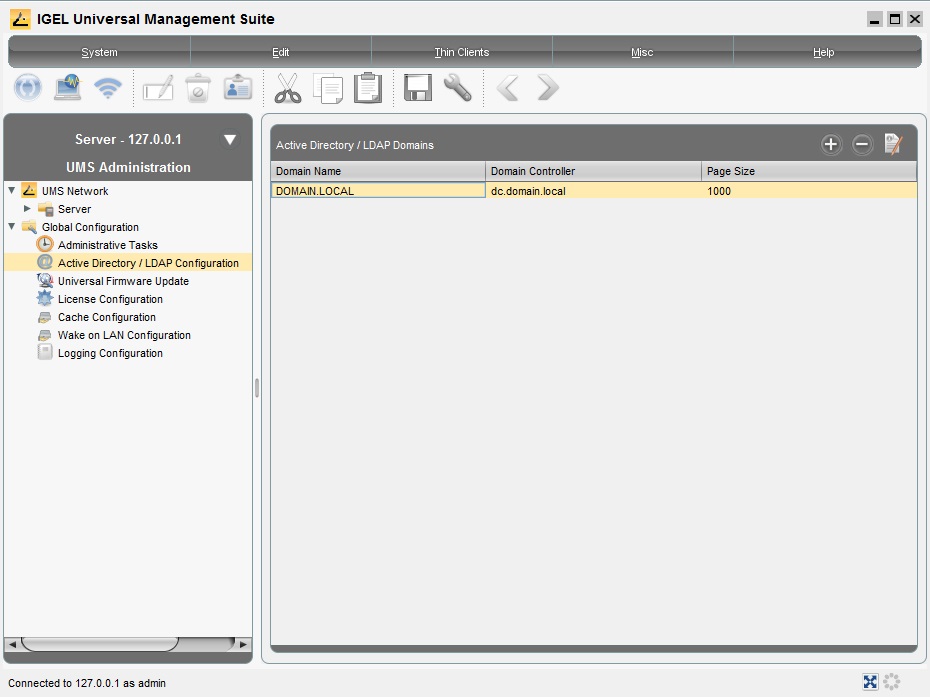
You will then see the Active Directory / LDAP Domain screen with your domain listed
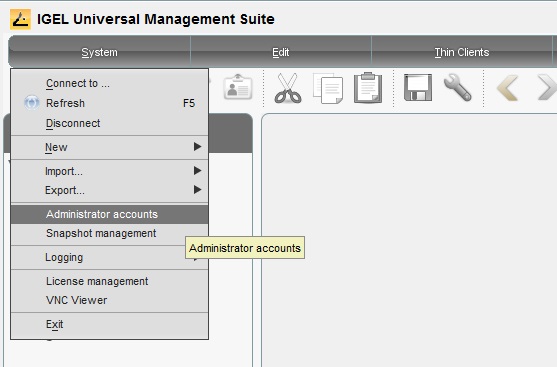
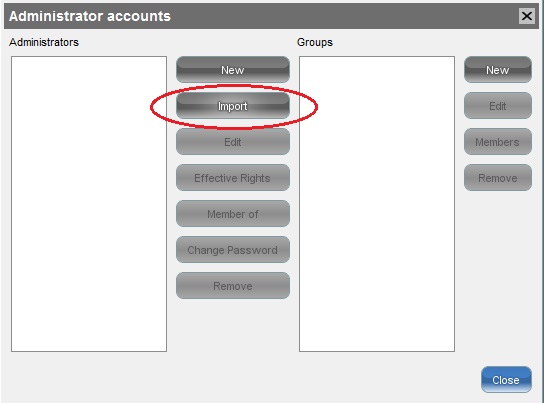
Now click on System at the top left and then click on Administrator Accounts.
On the Administrator accounts screen click Import.
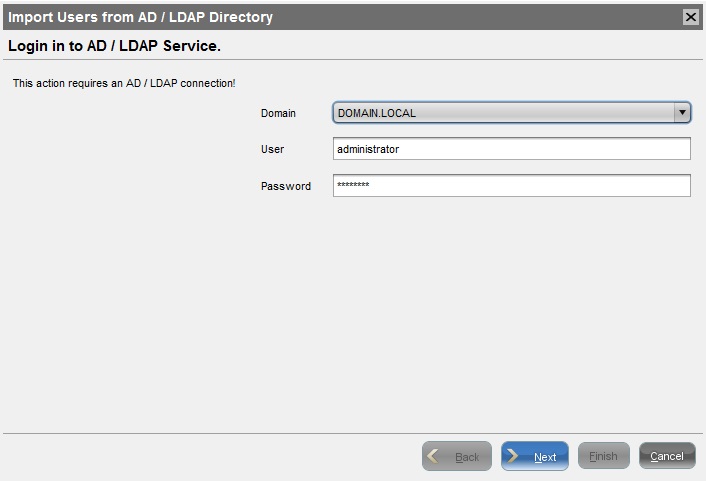
The Import Users from AD / LDAP Directory should already be populated with the account you used earlier. If not pop these details in, then click Next.
On the next screen enter your group name in the search box like I have and then click Search. Alternatively you can drill down and find your group / user you want to give access to.
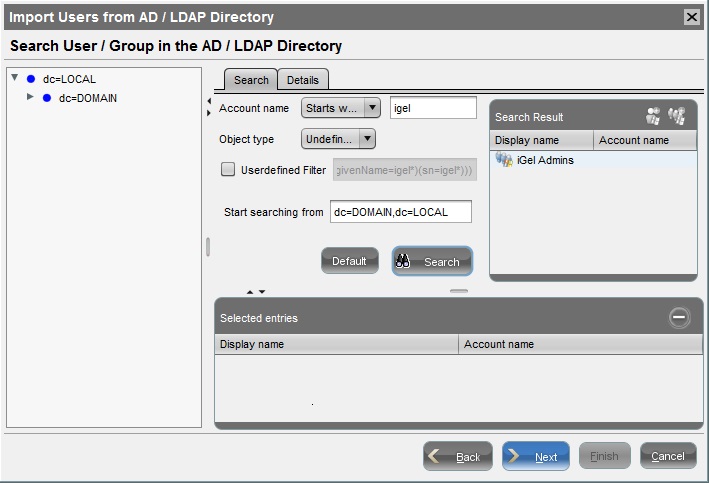
In the Search result screen, double click on the group name so it appears down the bottom in the Selected Entries box.

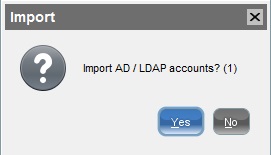
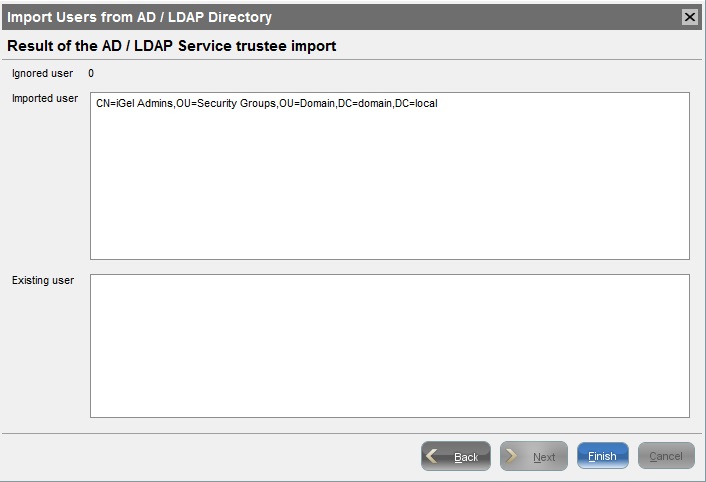
Click Yes when prompted if you want to Import the AD / LDAP accounts.
Click Finish at the Result of the AD / LDAP Service trustee import screen.
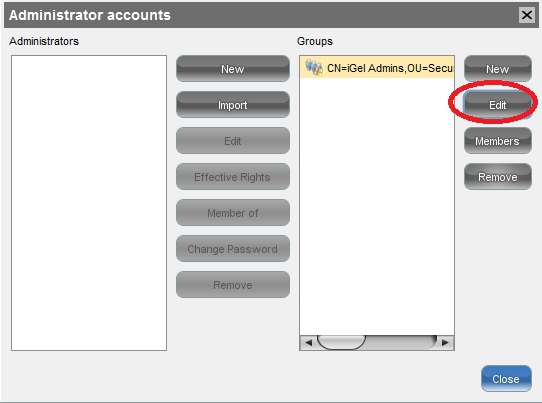
Now we need to give the group permissions login to the UMS. When your back at the Administrator Accounts screen click on the group you just added and then click Edit.
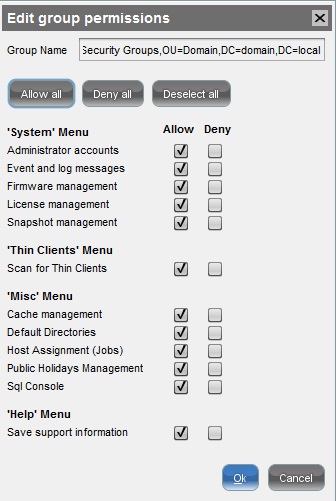
In my example I want the Group to have access to do everything, so I click Allow all and then click ok.
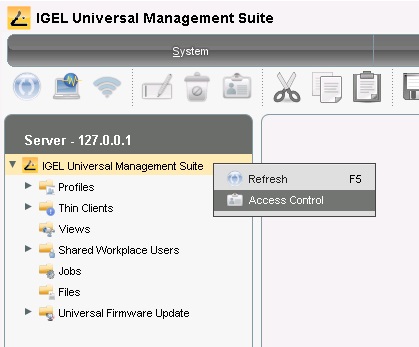
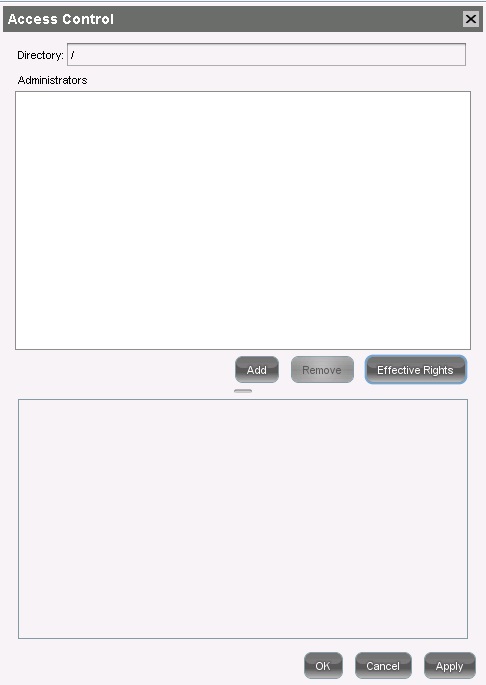
Then click close when your back at the next screen. You would think you would be done now. However we need to grant the group access to the igels etc. To do this right click at the top level of the tree and click Access Control
On the Access Control screen click Add
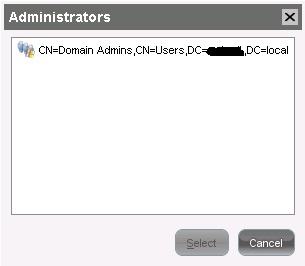
Your group should appear that you added earlier. Click on it then click Select.
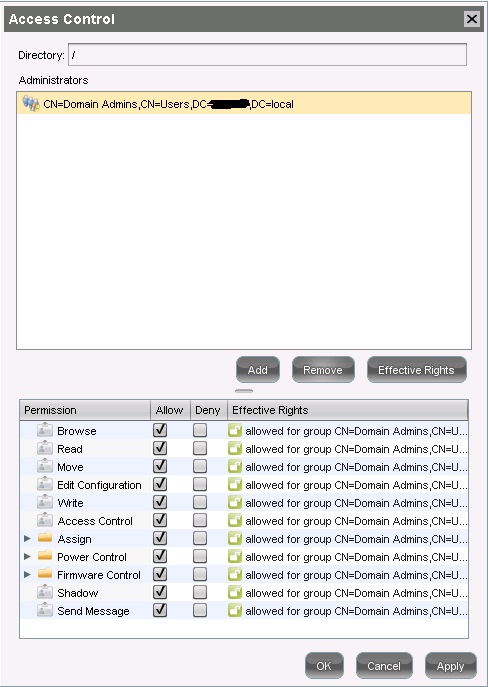
On the next screen. Click on your group and then click Allow to the permissions you want to allow. Then click ok.
All done 🙂
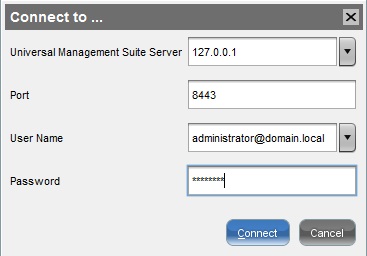
Now close the UMS and reopen it and when prompted enter your domain details. The username needs to be in the format [email protected]. NOT DOMAIN\username