If you need to create multiple users in Active Directory then this would take you ages if you had to do them one by one. Using the instructions below you can mass import users to Active Directory from a CSV file
There are a couple of prerequistes before you get started. The server needs to be running at least Server 2008 and have the Active Directory Module for Powershell installed.
Lets get started
1) Login to your 2008 Server, Preferably a Domain Controller
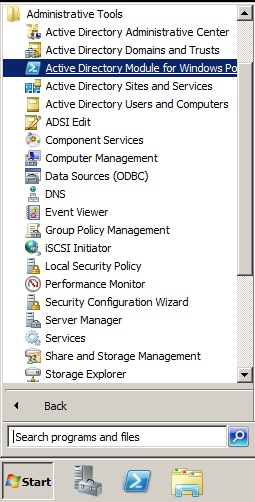
2) Run the Active Directory Module for Powershell. Start, All programs, Administrative Tools.
3) Your need to make some changes to the powershell permissions as were be running a unsigned powershell script. I’m not saying that these settings are recommended but they get it working. Run the commands below and say yes to each :-
Set-ExecutionPolicy Unrestricted
Set-ExecutionPolicy Bypass
4) Create a folder somewhere on your Hard Drive to house the script. I always create a folder in the root of C called NewUsers. Download the Powershell script from the link here and save it to this location. The script is made by someone called Rich Prescott. The original source files can be found Here.
5) In the powershell window change directory where you saved the file. Run the script using the command :
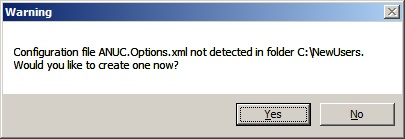
.\ANUC.ps16) Click Yes to the message that appears.
7) Click ok
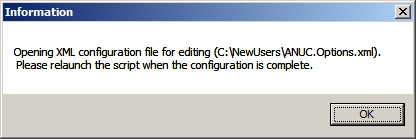
8) Close the text file that opens and run the command again
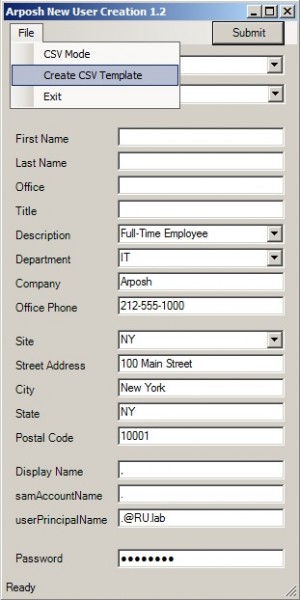
.\ANUC.ps19) A nice little window should appear. Click File, Create CSV Template. Save the file into your directory you created.
10) This CSV is the template we will use when were good to import them. Open up the CSV file in Excel.
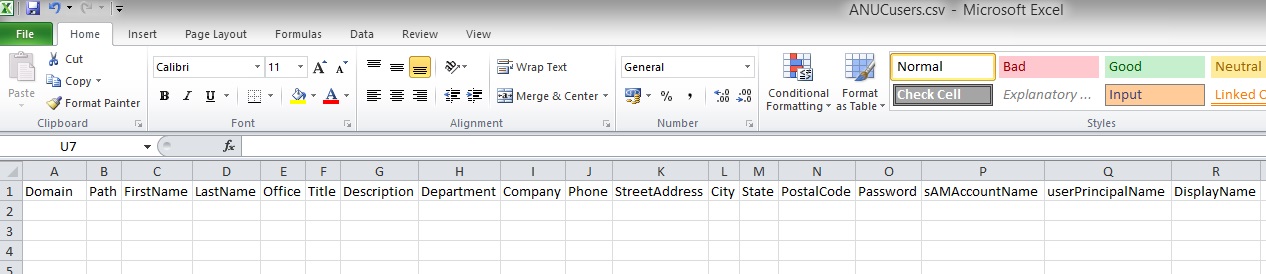
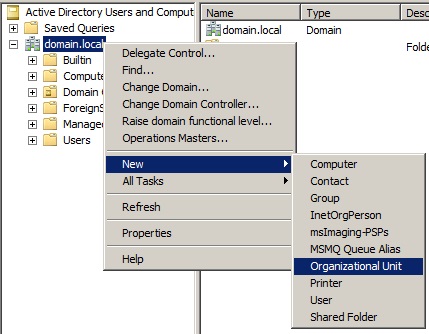
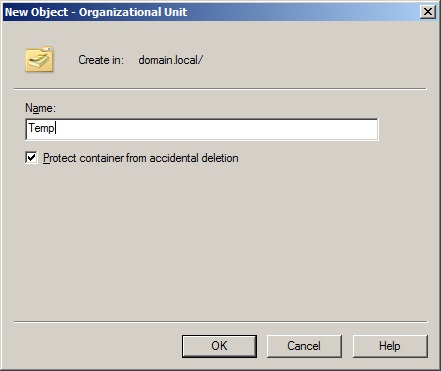
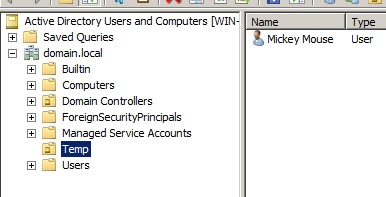
11) Each of the columns relates to a entry in AD. First of all lets open Active Directory and create an OU where we are going to put the new users. For ease i am going to create it in the root. Once in ADUC right click on the domain and click new organisational unit. Call it Temp. You can always move the users to their correct home after.
12) In my example my domain is called domain.local so the value for the 1st column would be domain.local
13) Path is the location to where in AD we want our users created. We want them created in a OU called Temp which is in the root so the value is
OU=Temp,DC=domain,DC=local14) The next few columns are self explanatory. The next column we need to concern ourselves with is Password. In this cell we need to put in the password that will be setup for this user. PLEASE NOTE THIS PASSWORD MUST MEET YOUR DOMAIN COMPLEXITY REQUIREMENTS OTHERWISE THE CREATION WILL FAIL.
15) In the sAMAccountName field put the users username.
16) The userPrincipalName is normally the username followed by the domain name. So in my example it would be [email protected]. If your after a easy of way of entering this data you can use the formula below to create the value correctly automatically
=P2&"@"&A217) The DisplayName is normally the Firstname followed by Surname. Again you can use a formula to do this.
=C2&" "&D218) I haven’t bothered with any of the address stuff so my finished spreadsheet for 1 user looks like below

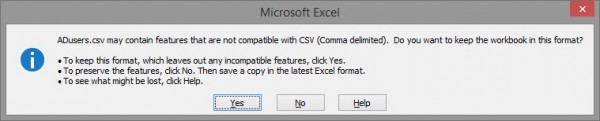
19) Since we’ve opened the CSV file in Excel we need to save it back with plain CSV formatting. Click yes when prompted when saving
20) Now go back to your powershell prompt and run the script again
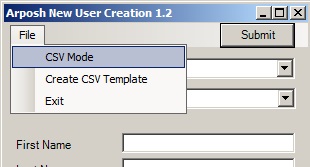
.\ANUC.ps121) On the GUI that appears click file, CSV Mode.
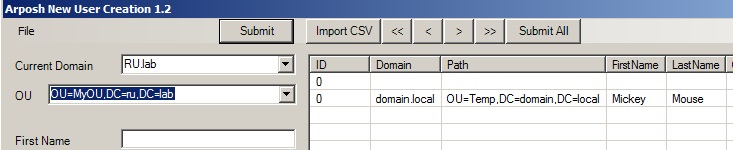
22) Your now get a large window appear. Click on the Import CSV

23) Browse to your CSV file and click ok. Your then see all the data imported into the fields.
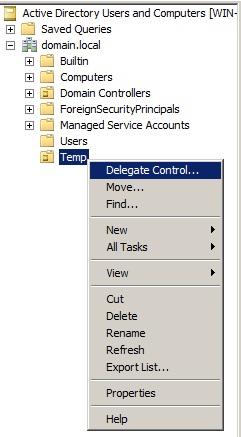
24) Before you click the submit button. I would advise to give the account your running the import as full delegate rights on the temp OU. To do this open Active Directory Users and Computers and right click on the temp OU. Click delegate control.
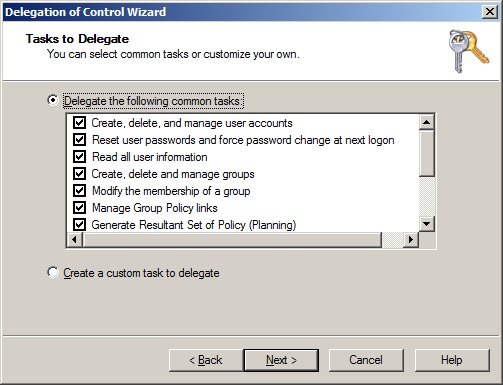
25) Click Next, and then click Add.
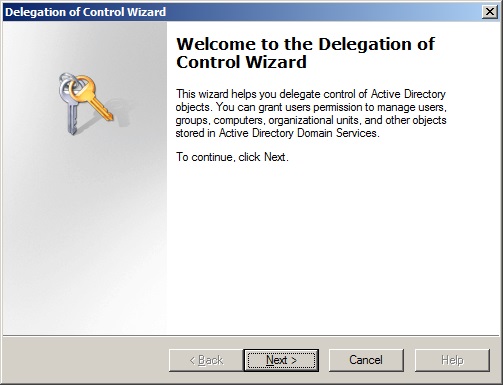
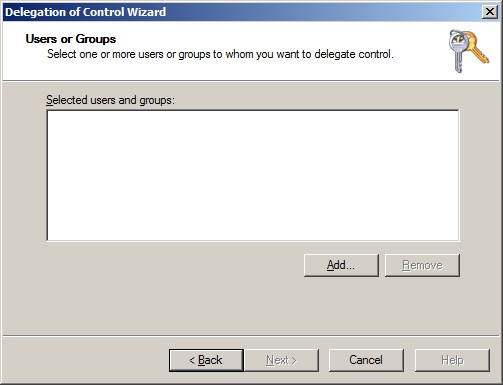
26) Add your user account and then click all the selection boxes. Click Next and then click finish.
27) Now you can go back and click the submit button. You should now see your accounts in AD..
Be aware though that these steps don’t create the exchange mailboxes. Your need to do these.