Over the last couple of months I have written a few articles covering Group Policy Preferences. I’ve shown how to create registry entries and Map Network drives. I have also detailed how to change Internet Explorer Homepage settings. All these guides can be found at the link below
Map Network Drives
Create Registry Entries
Change Internet Explorer Homepage
Today I am going to detail how to create desktop and start menu shortcuts for users using Group Policy Preferences. A lot of the steps are the same as the previous guides. So I will gloss over a lot of the finer detail and omit some basic screenshots. If you get stuck then please check out my previous guides. The Registry one goes into quite good detail.
First of all lets create a new GPO to work with. In the Group Policy Management Console, Right click on “Group Policy Objects” and then select new.
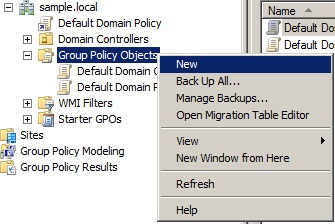
Lets call this GPO, Desktop icons then click ok.
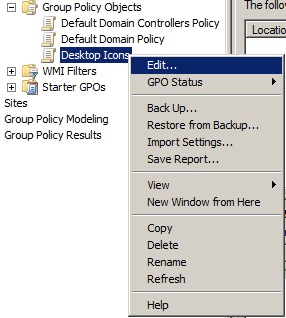
Now right click on the new GPO and click edit
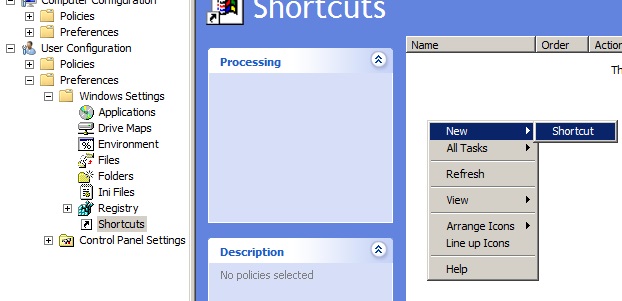
Branch out, User Configuration, Preferences, Windows Settings, Shortcuts, New Shortcut.
The new Shortcut window will now appear.
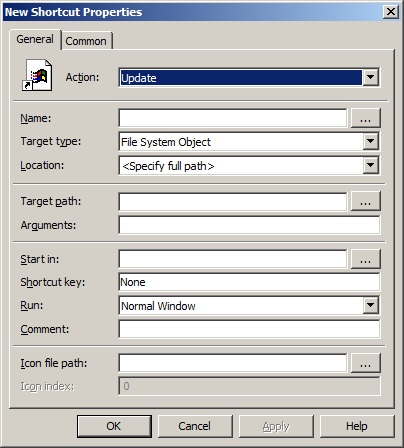
In my example we are going to create a desktop icon and a start menu icon for Microsoft Word 2010. To create the Word icon in the desktop we need the following data to be inputted into the shortcut window.
Action : Create
Name : Whatever you want to call it. In this instance I want the icon to say Word 2010.
Target Type : File System Object
Location : Desktop
Target Path : The path to the exe file. C:\Program Files\Microsoft Office\OFFICE14\winword.exe
Arguments : Leave Blank
Start In : The path to where the exe file is stored. C:\Program Files\Microsoft Office\OFFICE14
Shortcut Key : None
Run: Normal window
Comment : Leave Blank
Icon File Path : If you want to use a custom icon select it here. Leaving it blank will take the icon from the exe file.
Enter all the information into the dialog box and then click ok.
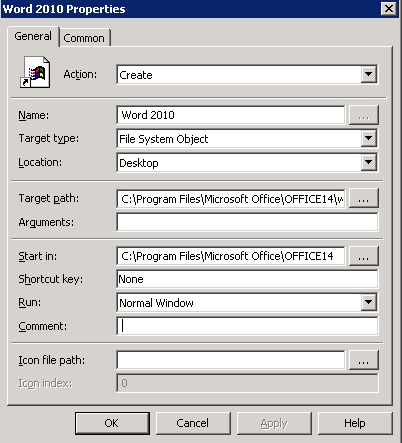
You should now see the Desktop icon created.

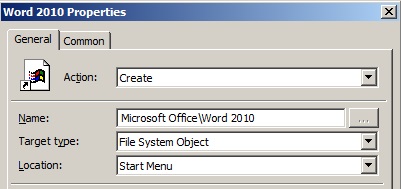
To create the start menu icon we can repeat the steps above but this time select Start Menu under Location.
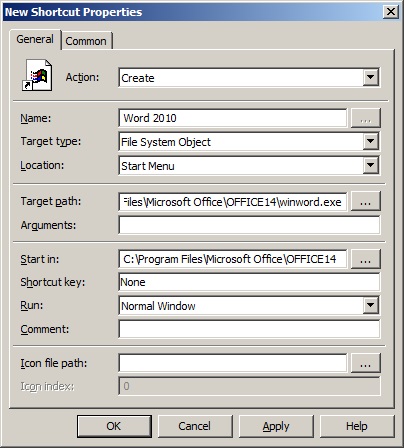
This will put the icon in the root of the start menu. If you wish for the icon to be placed into a folder then you can put the folder name before the Name. So if you wanted the Word 2010 icon to be placed inside a folder called Microsoft Office then you would put “Microsoft Office\Word 2010” under the Name field as shown below.
If you plan to change desktop icons quite a bit then you would be better to use update than create in the action type.
Once you have created all the shortcuts apply the GPO to the relevant OU and your good to go.
You might want to use item level targetting to make some icons appear for certain users. I will cover this in a seperate article.